OK…. these cinnamon rolls are seriously sooo delicious and also sooo easy to make- how great is that!? You can start them the day/night before and then awake to cinnamon rolls ready to pop in the oven- no early morning work required! I like the sound of that.
We have really great friends who live up in Seattle which IN TRAFFIC (oh.. there is always traffic..) can be quite a haul so when we spend the weekend together it’s usually an overnight or two at our place. There are few things I love more than serving hot coffee, fresh fruit and a breakfast dish to friends at our dining room table as we recount the night before. Given we usually like to have A LOT of fun when our friends visit I’m usually not in the best shape the next morning to whip up a warm brunch (thank you Prosecco…) Enter: these overnight rolls. Putting in a little bit of work the day before is going to be really worth it when you can have fresh ooey gooey cinnamon rolls within 45 min of waking.
Overnight Cinnamon Rolls
Yield: 12-14 rolls – prep time: 12- 16 hours – bake time: 30 minutes
INGREDIENTS
Sweet dough:
3 1/2 cups of all purpose flour
1 package of instant yeast
1 tsp. salt
1/3 cup sugar
1/3 cup butter melted
1 1/4 cup milk warmed
Cinnamon filling:
1 tbsp. cinnamon
1 cup brown sugar
1/2 cup butter melted
Icing:
1/4 block of softened cream cheese
1 cup of powdered sugar
1-2 tbsp. cream
1/2 tsp. pure vanilla extract
Let’s get started….
Step one: GET. EXCITED. Assemble the ingredients by placing your flour, sugar and salt in a standing mixing bowl with your milk, butter and yeast ready to go on the side.
It doesn’t take much to make the deliciously sweet and tender dough that will be the foundation of these rolls. The dough can be in the fridge “overnight” for close to 16 hours so don’t worry about when to start the day before. Just know you’ll need about 2 and a half hours of rise time and plan around that.
Step two: Heat your milk and melt your butter.
You want the milk to get just to the point where it would start simmering (scientific, I know). Once the milk is heated, I add the butter right in so it melts within the milk. You can keep the milk on the heat at this time but make sure it doesn’t start to really simmer or boil.
Once the butter is melted, let the mixture sit for 1-2 minutes.
Step three: Add the yeast packet into your dry ingredients and pour in the milk & butter mixture.

Step four: Using the dough hook (looks literally like Captain Hook’s hook and I’m starting to wonder if he baked with it for all the other Pirates? Probably not because he was a massive grump) mix the dough on medium speed until all of it has pulled away from the sides of the bowl and come together like this:

Then throw that bad boy on your counter with a dusting of flour underneath to keep it from sticking:
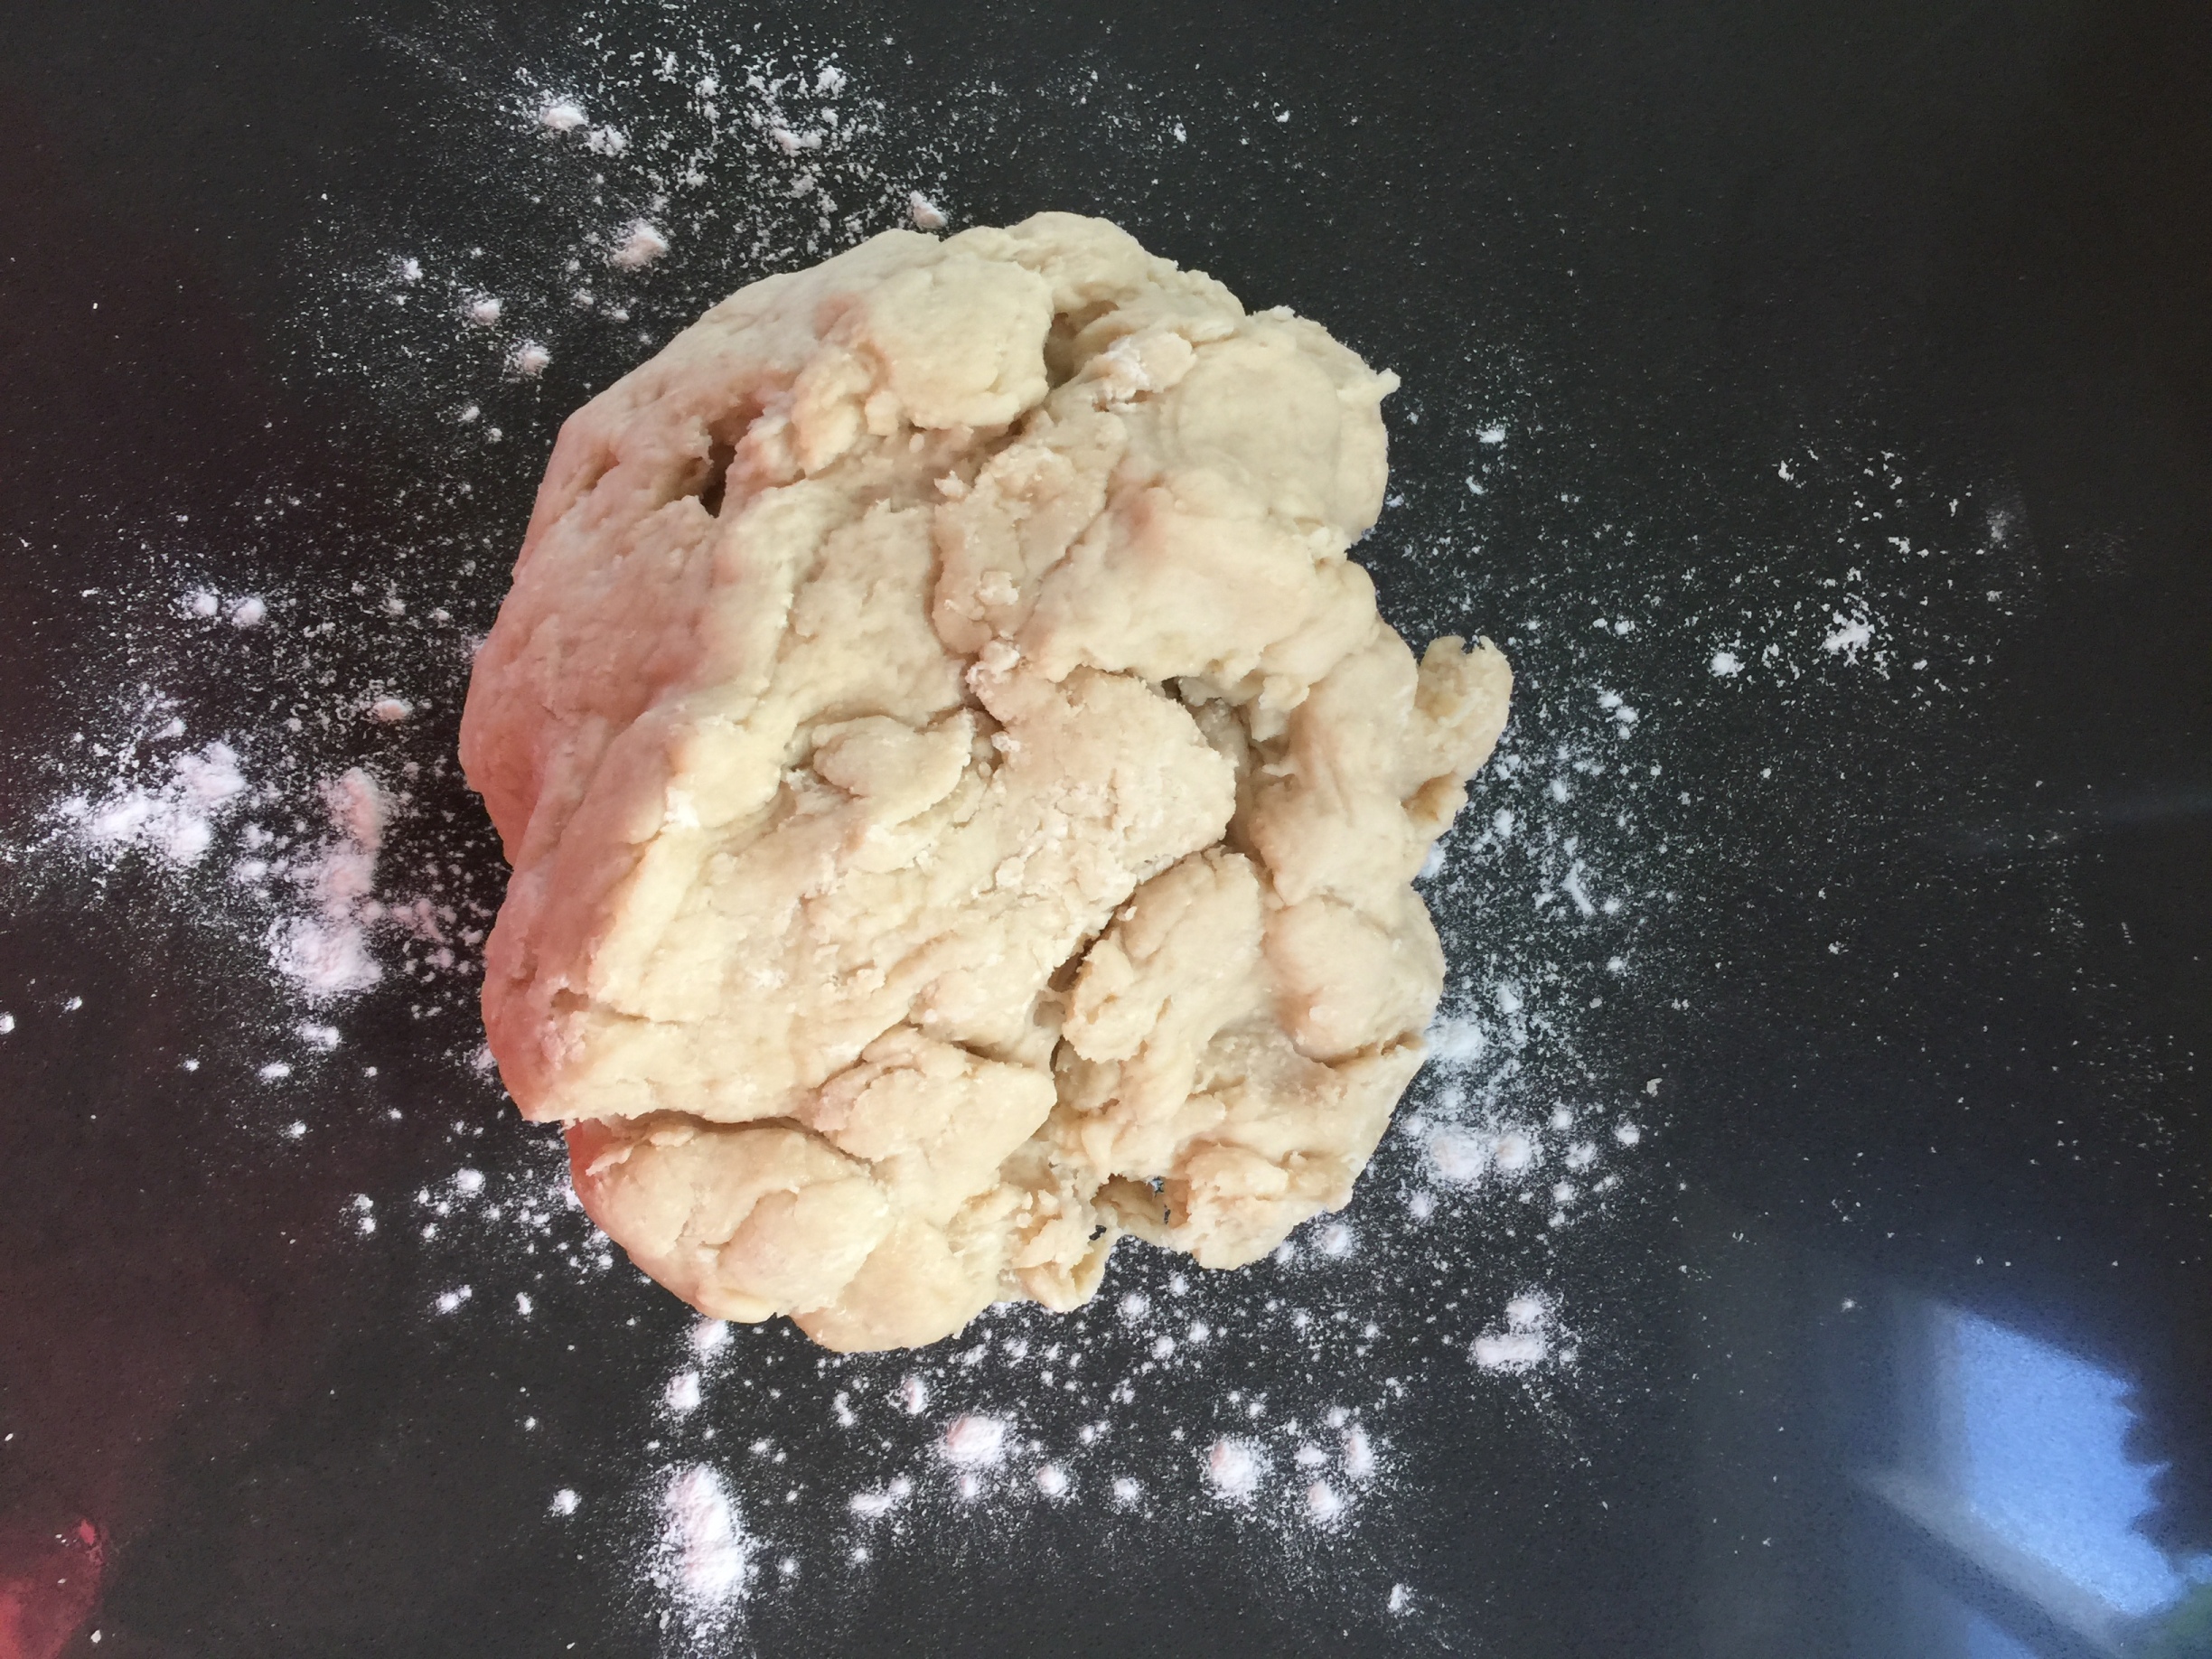
Step five: Knead the dough like it’s your job!! It is seriously such a workout kneading dough that you may be sore the next day… not that that happened to me or anything…
Knead the dough for about 5-8 minutes until it looks smooth and gorgeous like this:

While we’re here let me tell you about this dough… at this point you could use it in really any way you want. It’s the perfect “sweet bread dough” for things like monkey bread, sweet dinner rolls, etc.. I’m going to call it my “accidental sweet dough” because I came up with the recipe accidentally. I read through about 4-5 different recipes and decided what I wanted to try from each one. After I finished and it passed the taste test with my husband I went back to make sure I recorded the recipe correctly and I noticed something!!! I’d forgotten to add two eggs like I originally planned… whoops! We agreed they must not have been that important LOL maybe one day I’ll do a comparison but for now.. carry on!!
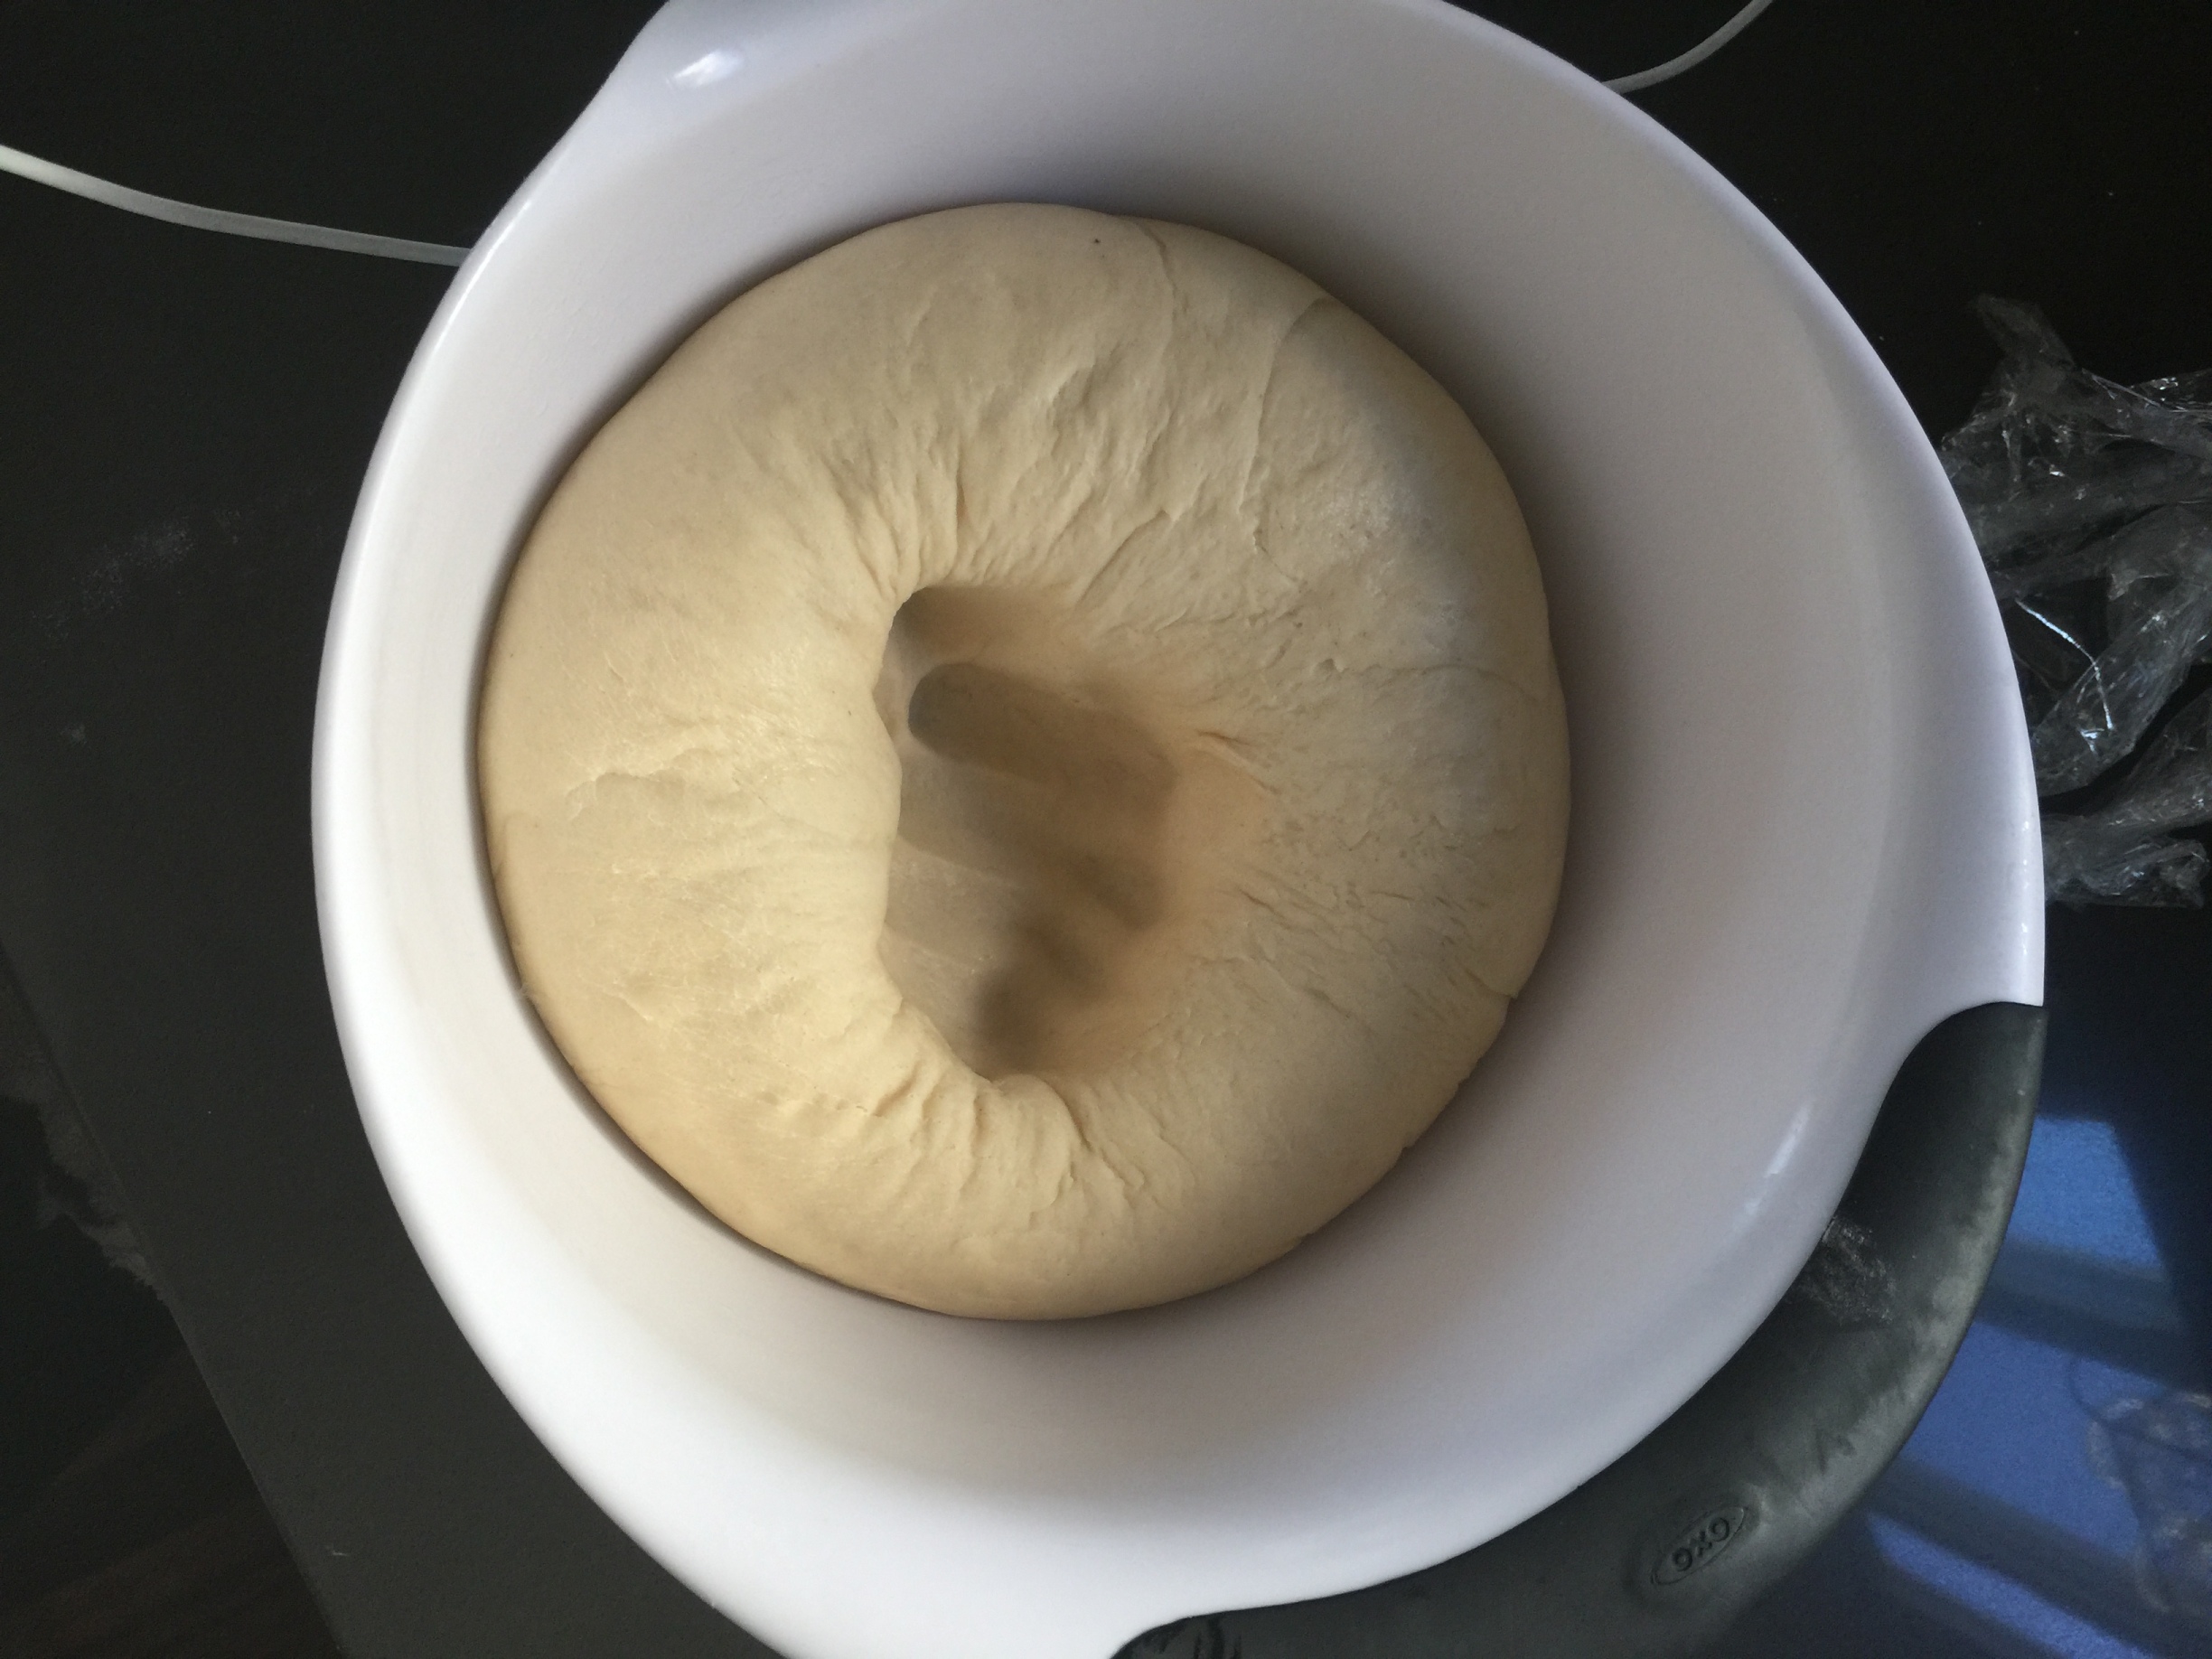
Step six: Place the dough ball in an oiled bowl and cover with a dish towel or loose plastic wrap. Put somewhere warm or leave on your counter for two and a half hours.
Step seven: Once two and a half hours has passed the dough should have doubled in size. Give it a good PUNCH:
Then turn it out onto a lightly floured surface.
Step eight: Using a lightly floured rolling pin (if you don’t have one of these you can use a wine bottle– now, I KNOW you have one of those…) roll the dough into a large rectangle:
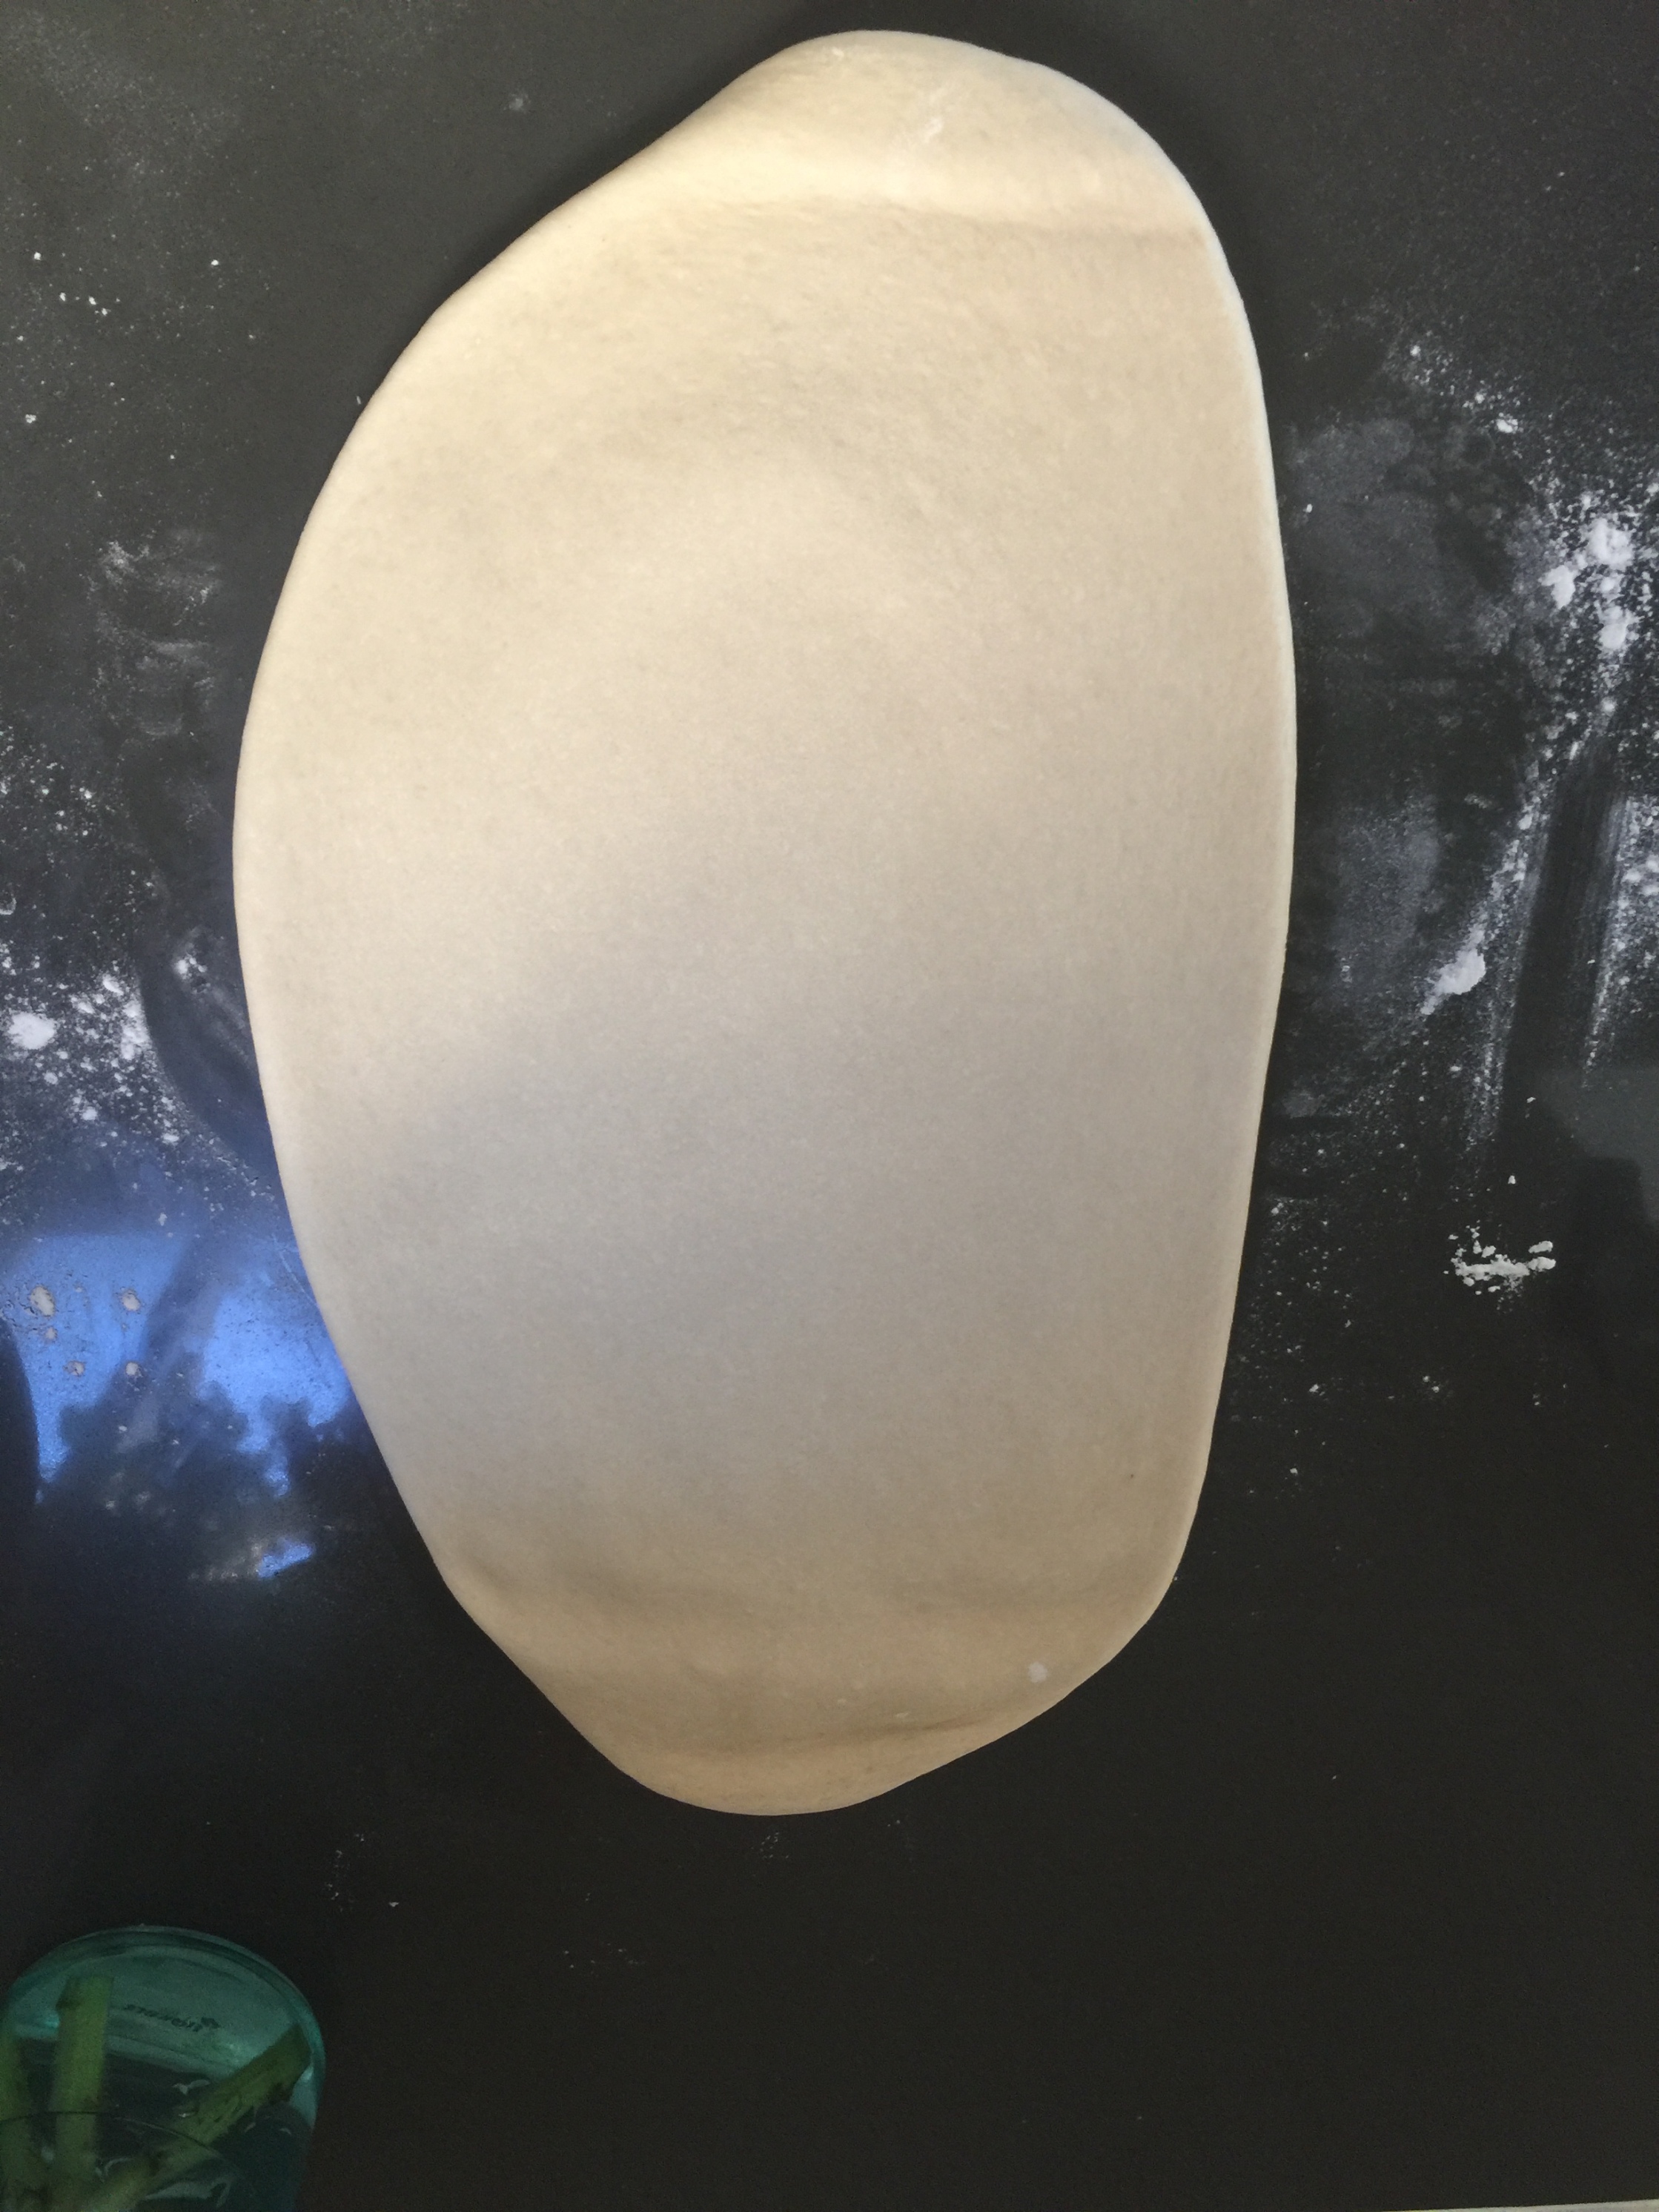
OK so this is more of an oval….ish than a rectangle but you get the idea! IMPORTANT NOTE: the thinner you roll the dough the more the cinnamon & sugar is going to shine. Keeping the dough a bit thicker will make for a doughier cinnamon roll- both are fabulous so just decide what you’re looking for and roll accordingly!!
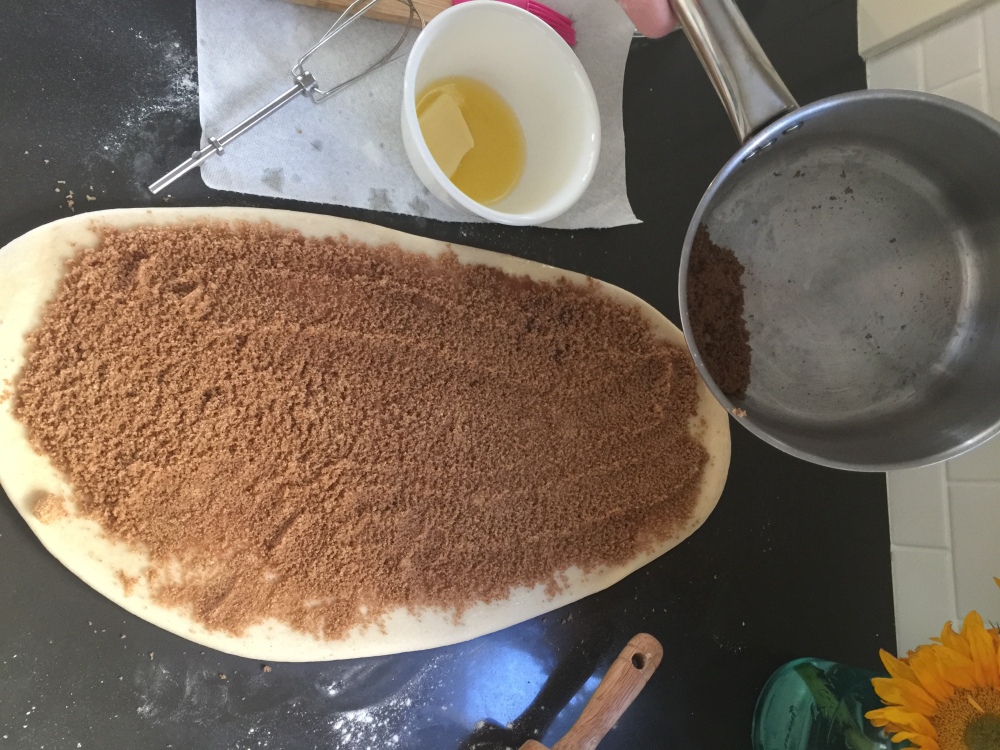
Step nine: Melt a stick of butter and spread all over the dough until covered- you may not use all of the butter but if you do I am NOT judging. Then, sprinkle on the cinnamon & sugar mixture until the entire face of the dough is covered minus the outer edge. You may be left with a little bit of cinnamon & sugar which is fine- I like to save it then sprinkle on top before baking.
Step ten: Begin on one of the long ends of the ovactangle (see what I did there?) and very tightly roll into a long log. Pinch to seal at the edge with your fingers and then using a serrated knife slice the log into rolls:


Place as many rolls as you can fit (extras can be frozen and baked another time) into a greased baking dish, cover with plastic wrap and put in the fridge overnight.
____Sleep______
Step eleven: Wake up and get excited for cinnamon rolls!!! Once the overwhelming excitement passes and you are able to begin, grab the cinnamon rolls and put them somewhere warm until they rise up and get puffy. If you are like me and have an un-insulated attic and it’s summertime- the attic is the perfect place to let the rolls rise!!! IF NOT.. you can put your oven on the lowest heat settings (remove the plastic!!) and let them rise in there. They are done rising when they go from looking like this:

to this:

Step twelve: If you had extra cinnamon sugar from the day before, sprinkle on top now. Pre-heat the oven to 350 degrees and once preheated put the rolls in for 30 minutes.
Step thirteen: Enjoy the amazing smell filling your kitchen!!!! But while you do- let’s make the icing. Using a hand-held mixer, beat the softened cream cheese, powdered sugar, cream & vanilla until smooth. Set aside until the rolls are done.
side note: Icing can be intimidating to make but if you find it gets too thick, just add a splash more cream (milk also totally works) and if its too watery you can add more powdered sugar!
Step fourteen: The GRAND FINALE!! Once the rolls are done, pull them out of the oven and cover with all the icing. Oh, and.. DIG IN!!!


This is so awesome! I’m all about doing the least amount of work in the morning! These look perfect for either a week day before going to the office, or on a Saturday night before football game watch parties on Sunday mornings!
LikeLiked by 1 person
Thanks Brittany! Totally agree with you– putting in the effort ahead of time pays off in a big way!! And it’s worth it to use a yeast dough recipe IMO so this is the way to go!!
LikeLiked by 1 person